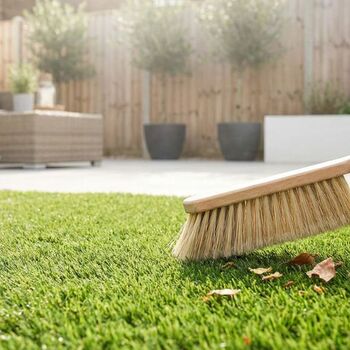
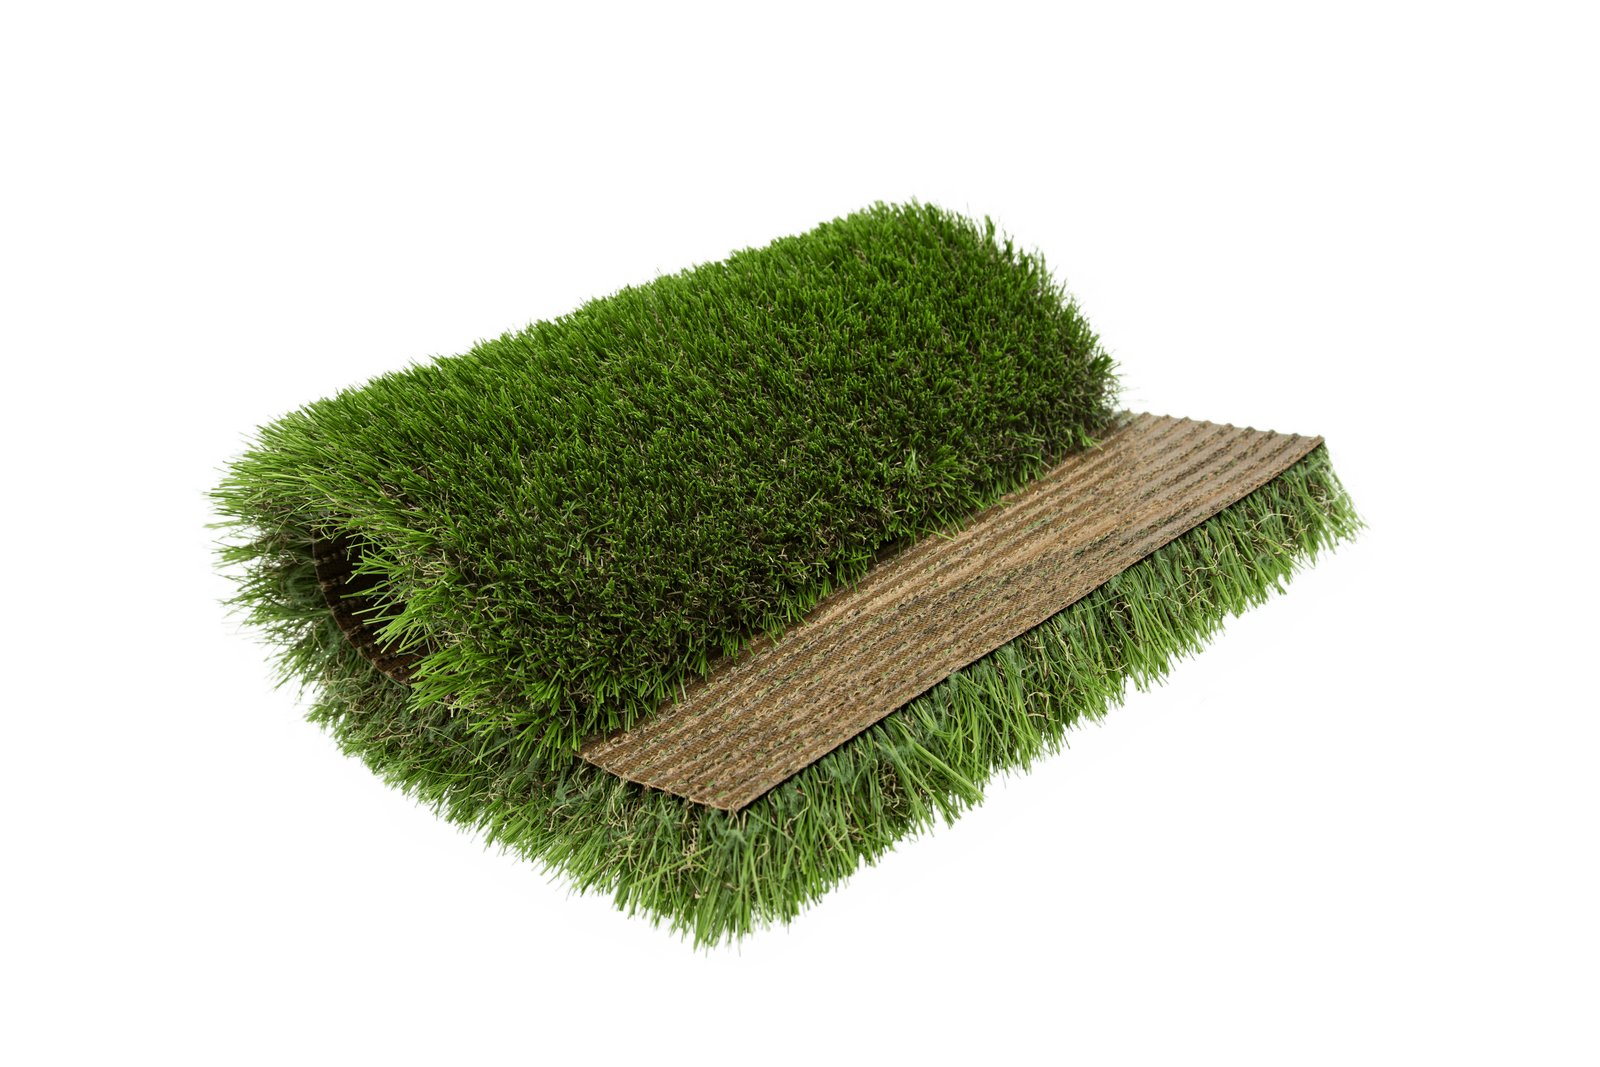
How to repair damaged artificial grass in 5 easy steps: cuts, burns and dents
Always green and comfortable, your artificial grass is made to last... but it is not indestructible.
With daily use, cuts, burns from embers or heat sources, wear and tear in high-traffic areas, or sinking due to a poorly compacted base may appear.
The good news is that you don't have to replace it entirely; you can repair your artificial grass yourself with quick and clean solutions. Whether it's a family garden with children and pets, a patio or a play area, here's a step-by-step guide to restoring it to its former glory.
Are you with us?
Main reasons why artificial grass gets damaged
Although it is resistant, your turf can suffer minor incidents that affect its appearance and durability. These are the cases we see most often when repairing artificial turf:
- Accidental cuts and tears
- How it happens: box cutters, pruning shears, furniture legs with sharp edges, or sharp objects.
- Typical sign: straight or V-shaped lines where the fibres are torn open and the backing is visible.
- Quick prevention: cutting board for close-up work and protective caps on furniture.
- Quick diagnosis: if the cut is clean and narrow, a patch + bonding tape underneath is usually sufficient.
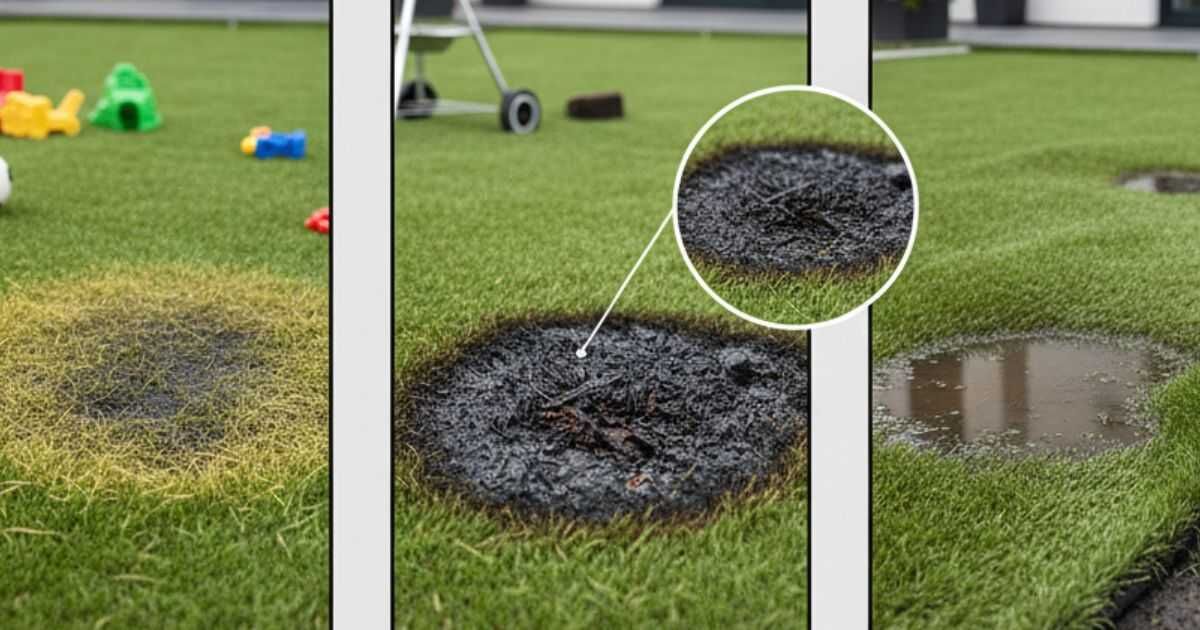
- Specific burns caused by heat
- How it happens: barbecue embers, cigarettes, overheated metal pots, concentrated sunlight.
- Typical sign: hardened, shiny or 'melted' area.
- Quick prevention: fireproof bases under barbecues, ashtrays with lids, heat insulators under plant pots.
- Quick diagnosis: when the damage does not go through the backing, localised trimming and a micro-patch leave an invisible finish.
- Sinking and potholes
- How it happens: concentrated weight (plant pots, hot tubs, sheds) or heavy traffic on poorly compacted base.
- Typical sign: depression/bowl where water stagnates and the grass is flattened.
- Quick prevention: distribute loads with platforms; check compaction and drainage.
- Quick diagnosis: if the depression gives way when stepped on, lift it, recompact the base and replace the silica.
- Wear and tear from intensive use
- How it occurs: walkways, play areas or repeated turns (bicycles, chairs).
- Typical sign: flattened fibres, loss of volume, localised matting.
- Express prevention: periodic brushing against the grain and, if the model allows, replenishing with silica sand.
- Quick diagnosis: if the backing is intact, electric brushing + silica usually fixes the artificial grass without replacing any parts.
- Photoaging due to sun exposure
- How it occurs: prolonged UV radiation on models without good UV protection.
- Typical sign: progressive discolouration or brittle fibres.
- Express prevention: turf with UV stabilisers; occasional shade (awnings/pergolas) at peak times.
- Quick diagnosis: when there is marked colour loss, the solution is to replace the affected fabric.
- Chemical damage
- How it occurs: solvents, concentrated bleach, aggressive degreasers, fertilisers or paint.
- Typical sign: irregular discolouration, stiff fibres, softened backing.
- Express prevention: cleaning with neutral soap or specific products; test beforehand on a hidden area.
- Quick diagnosis: if the chemical has affected the colour or backing, it is advisable to cut and patch the artificial grass.
Has your artificial grass already fallen victim to any of the elements mentioned above? In most cases, it is relatively easy to repair the damage, but remember: prevention is better than cure!
Learn how to repair artificial grass step by step
Artificial grass is very durable, but when a cut or burn appears, there's no need to panic: most of the time it can be repaired, and sometimes even with quick repairs or maintenance.
Are you a handy person and want to try doing it yourself? We'll tell you how to do it step by step.
Of course, if you're looking for a perfect result, with invisible joints and a professional finish, we recommend that you rely on an expert installer.
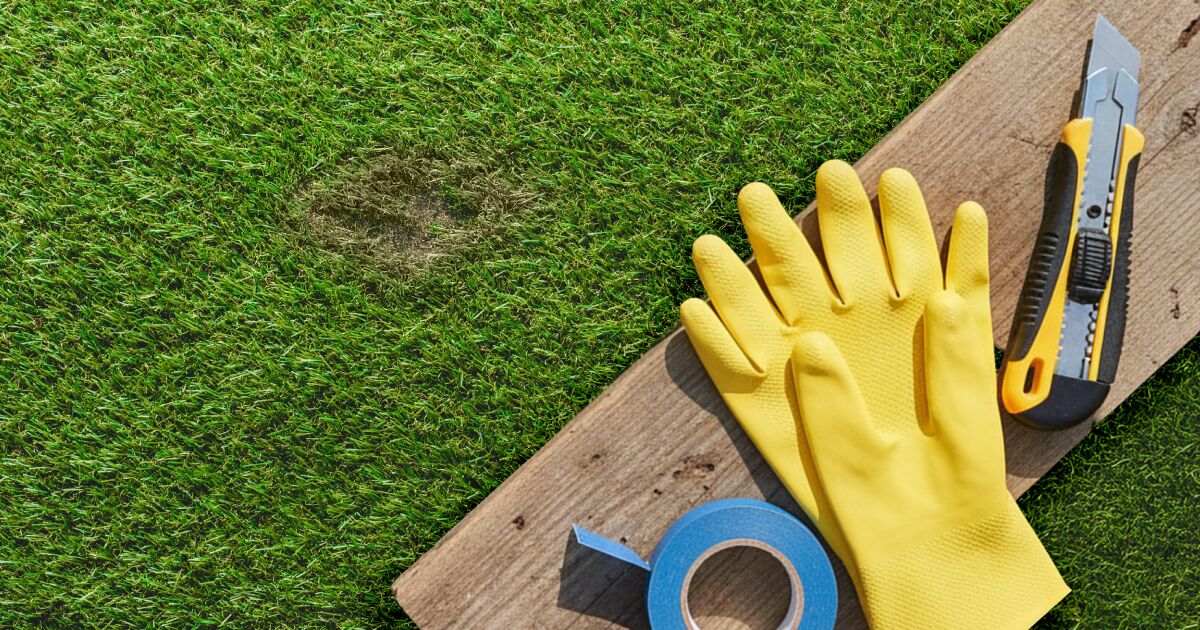
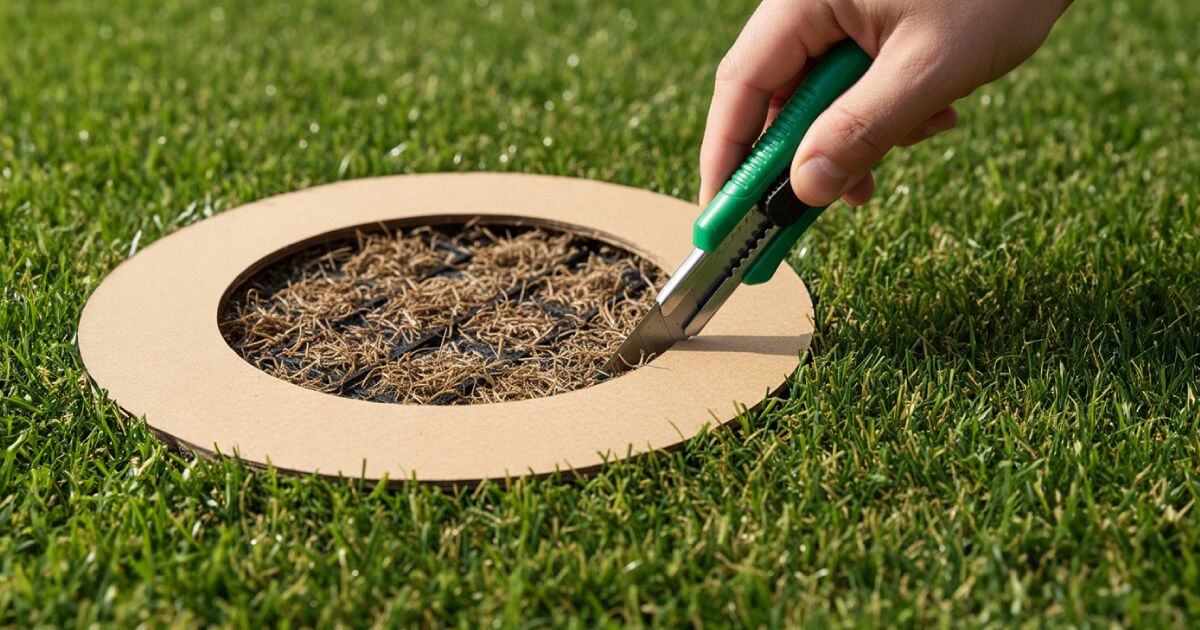
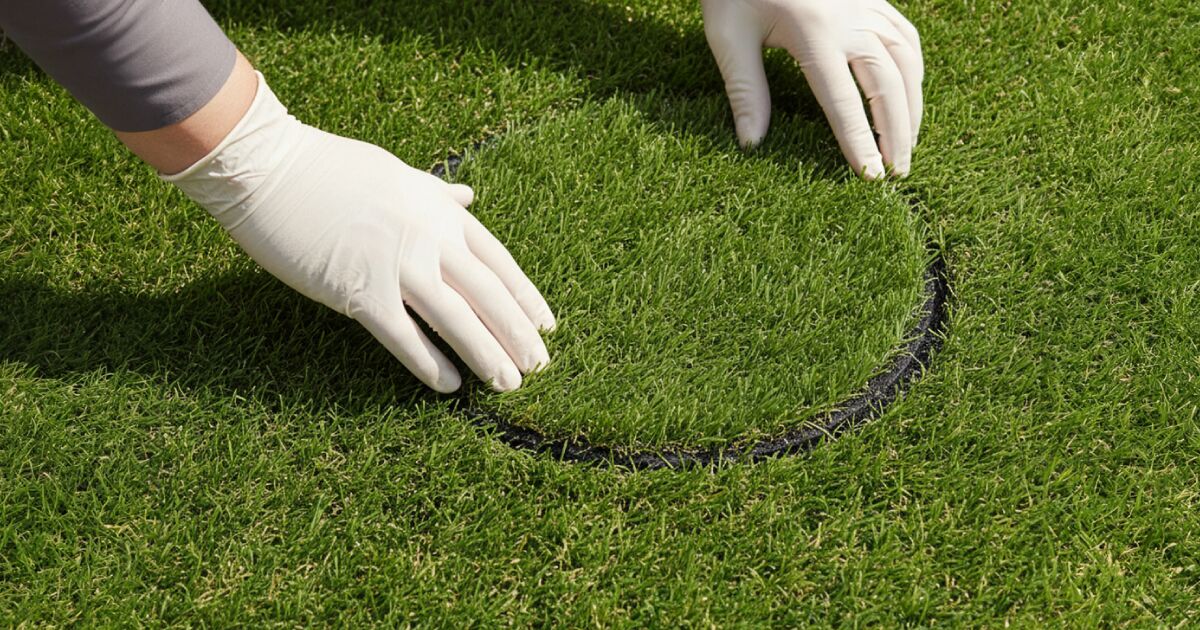
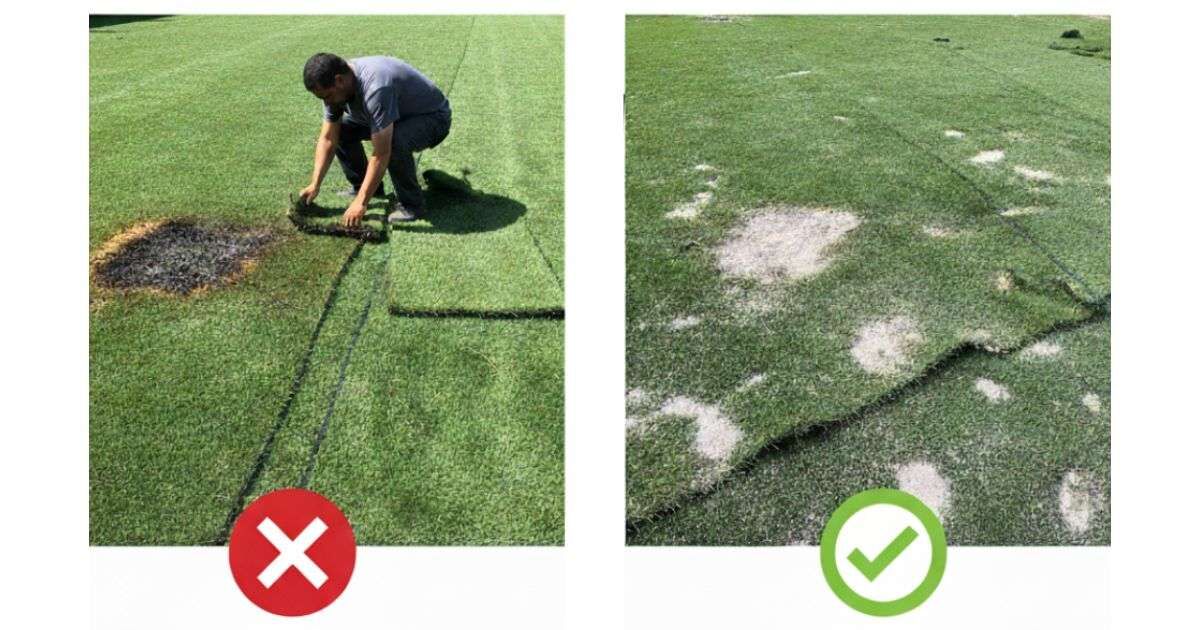
Step 1: remove the damaged area
Use a round lid or cardboard template as a guide and trace a curved shape around the affected area. Cut it with a craft knife deep enough to cut through the backing (not just the fibres).
Pro tip: when replacing a piece of damaged artificial grass, if you cut a square or rectangular patch, the straight lines are very noticeable and the human eye detects them immediately. On the other hand, if you cut the piece in a rounded shape or with irregular edges (organic "S" curve), it will blend in better with the rest because curved shapes camouflage more naturally.
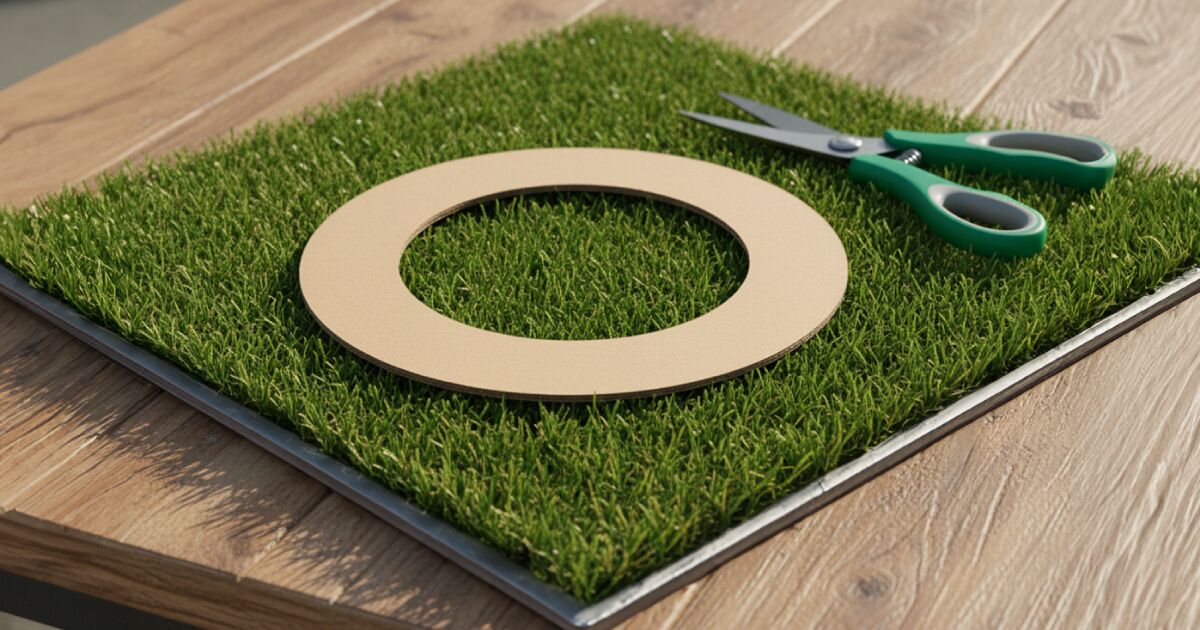
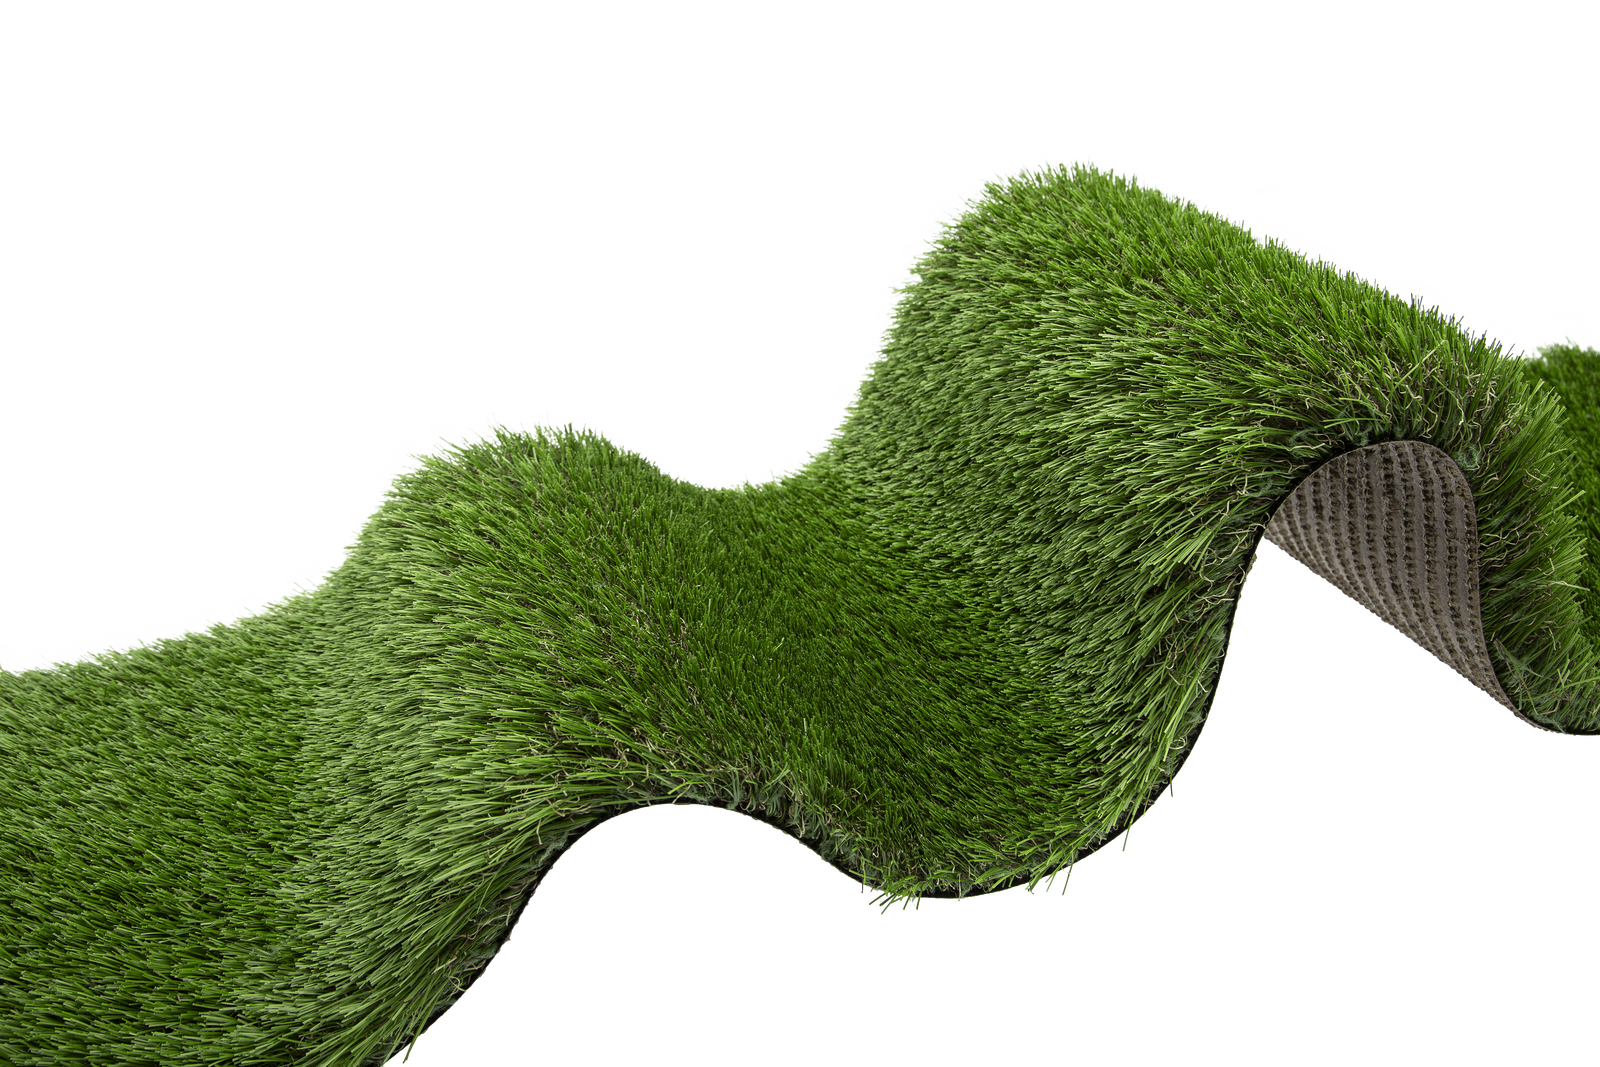
Step 2: Prepare the replacement turf mat
Now, use the lid or piece of cardboard as a template to cut the same shape out of the leftover or new artificial grass.
Pro tip:
- Always cut from the backing, following the stitch lines so that the edge is clean.
- Use a sharp craft knife and make several gentle passes rather than one deep cut.
- Follow the same direction of the pile as the rest of the grass (you can mark this with an arrow).
- Leave a margin of 1–2 mm around the edge and adjust little by little until it is flush.
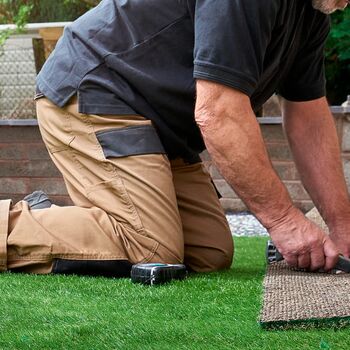
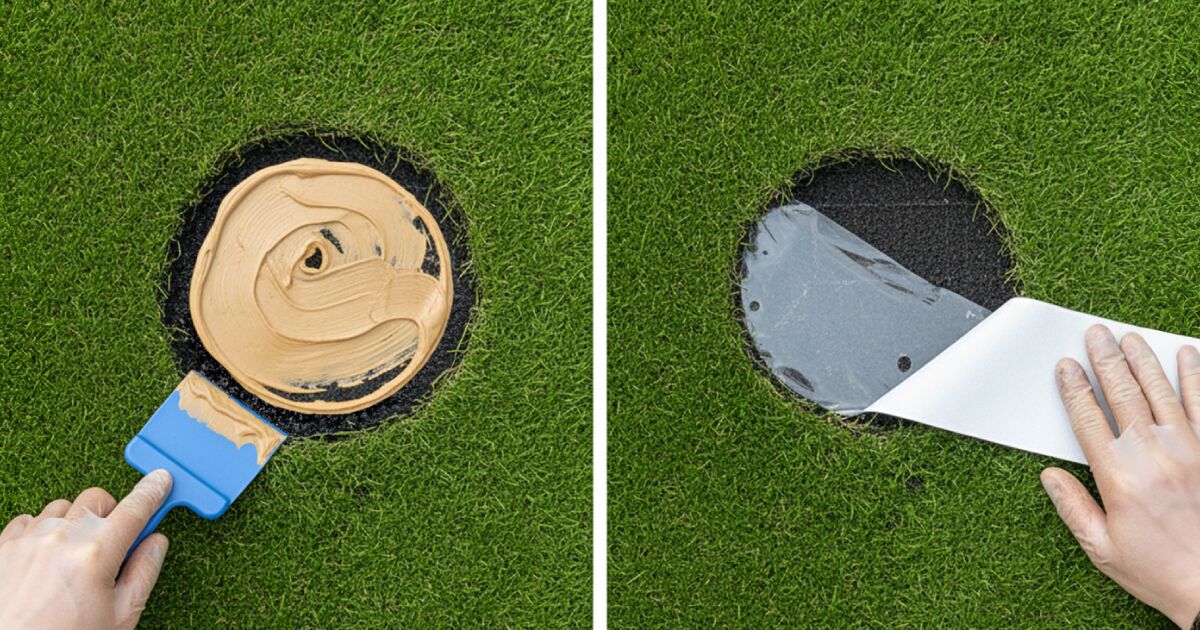
Step 3: Apply the bonding tape
Place a strip of bonding tape under the hole you have cut out, so that it rests on the base of the grass surrounding the damaged area.
If the tape is self-adhesive, simply remove the protective backing and stick it down (minimum 5 cm per side).
If it is normal tape, spread a little artificial grass adhesive on it and on the underside of the backing (in a zigzag pattern and comb the fibres outwards), always taking care not to stain the surrounding fibres.
Step 4: Fit the replacement artificial turf
Gently adjust the replacement piece of synthetic turf into place. Press down to ensure a strong bond.
Pro tip: Lay the replacement piece of turf with the fibres running in the same direction as the rest of the surface. Check that the rows of backing match and that the turf is evenly “combed”. This will prevent the patch from standing out due to differences in colour or shine.
If the model contains silica, you should sprinkle it on thinly and brush it in to even out the shine.
Step 5: allow to dry
Avoid walking on your newly restored artificial grass for about 4-6 hours (24 hours is ideal) to allow the adhesives to do their job. After that, all that's left to do is admire your work!
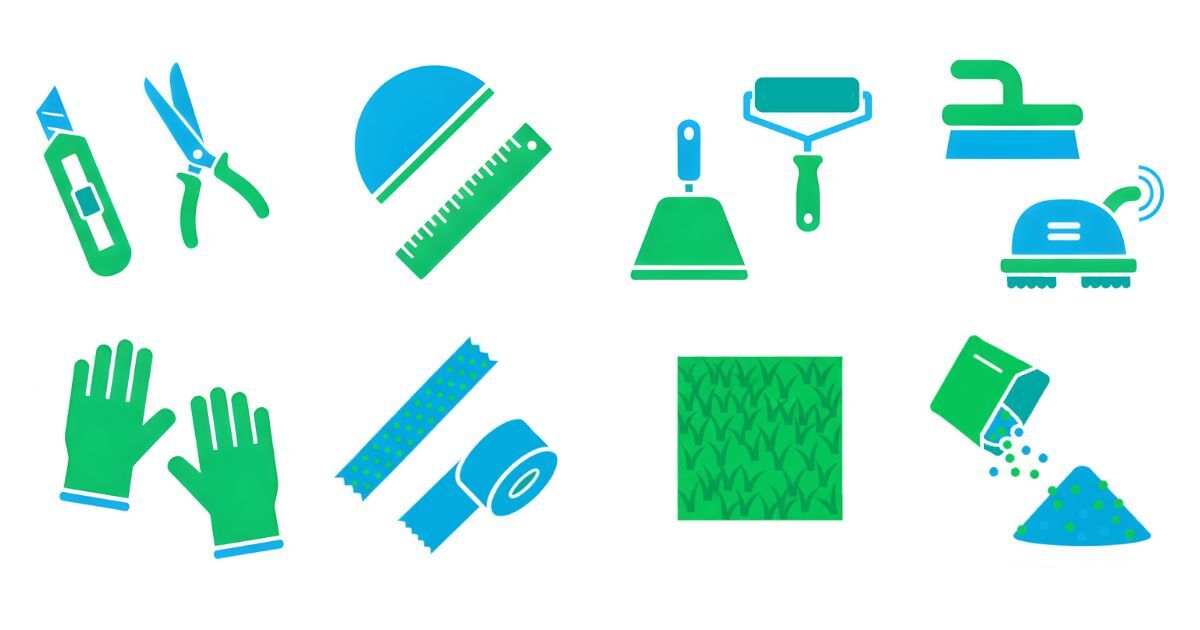
Recommended tools for repairing your synthetic turf
Having the right tools is essential for restoring artificial grass. These are the ideal ones:
Tools
- Professional cutter with new blades and garden shears: clean, controlled cuts.
- Template (cap/semicircle/cardboard) and flexible ruler: guides for curved or S-shaped cuts.
- Plastic spatula and pressure roller: spread adhesive and settle the joint.
- Stiff bristle brush or electric brush: lift fibres and even out the area.
- Gloves and masking tape: safety and temporary fastening.
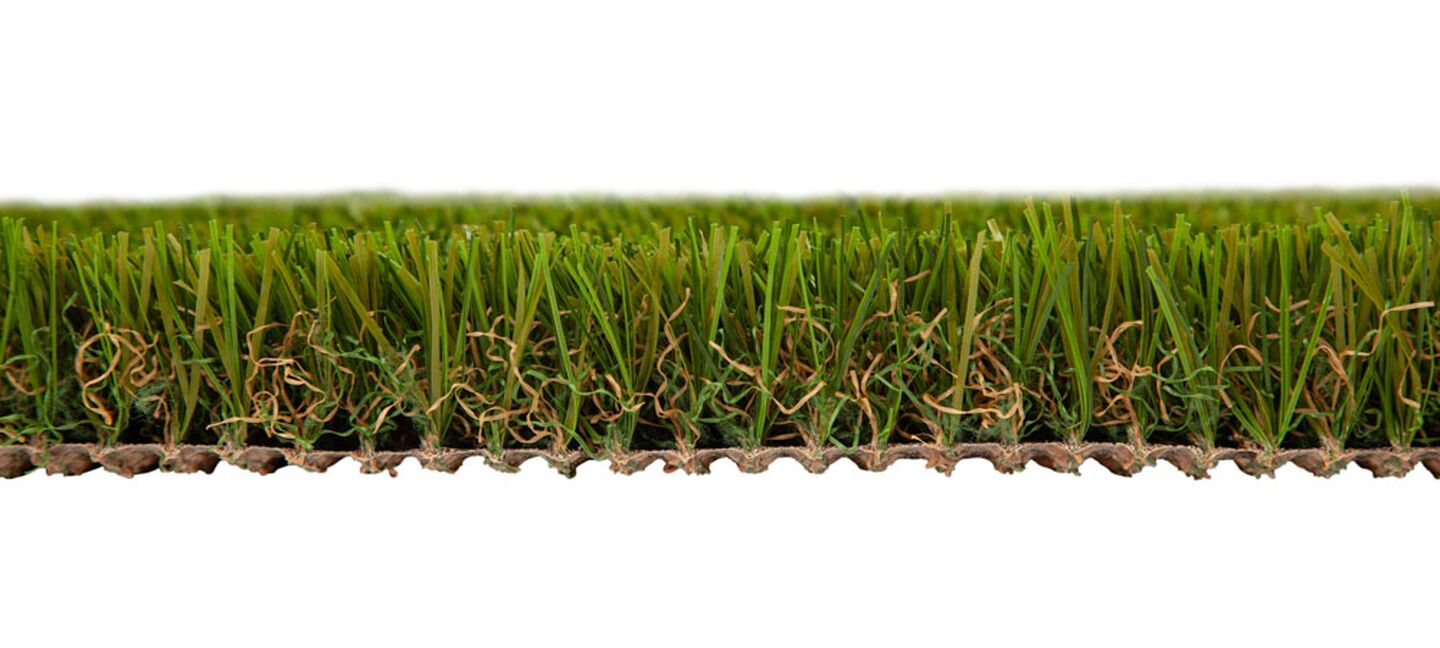
Materials
- Artificial grass joint tape (self-adhesive or for adhesive).
- Outdoor polyurethane adhesive (UV, moisture and temperature resistant).
- Patch from the same model/batch of turf.
- Filler or silica-rubber sand (if the model allows): stabilises, improves drainage and conceals the patch.
What not to do when repairing your artificial grass
At Turfgrass, we have seen how small mistakes can compromise the final result and shorten the life of the turf.
Here are the most common mistakes to avoid:
- Using non-specific adhesives: Generic glues do not guarantee a durable, professional bond. Over time, the patch may come unstuck, especially in areas with heavy traffic or sun exposure.
- Not cleaning the artificial turf properly before repairing: Dirt, dust or fibre debris prevent the adhesive from bonding properly. A clean surface is the key to effective repair.
- Forgetting to brush after installing a patch: Brushing helps to visually integrate the repaired area with the rest of the turf, concealing cuts and possible differences in texture.
- Exposing the turf to heat sources or harsh chemicals: The use of solvents, bleach or heat tools can melt the fibres or change the colour of the turf.
- Not checking compatibility between models: Not all types of artificial grass have the same height, density or shade. Using an incompatible cut can ruin the repair.
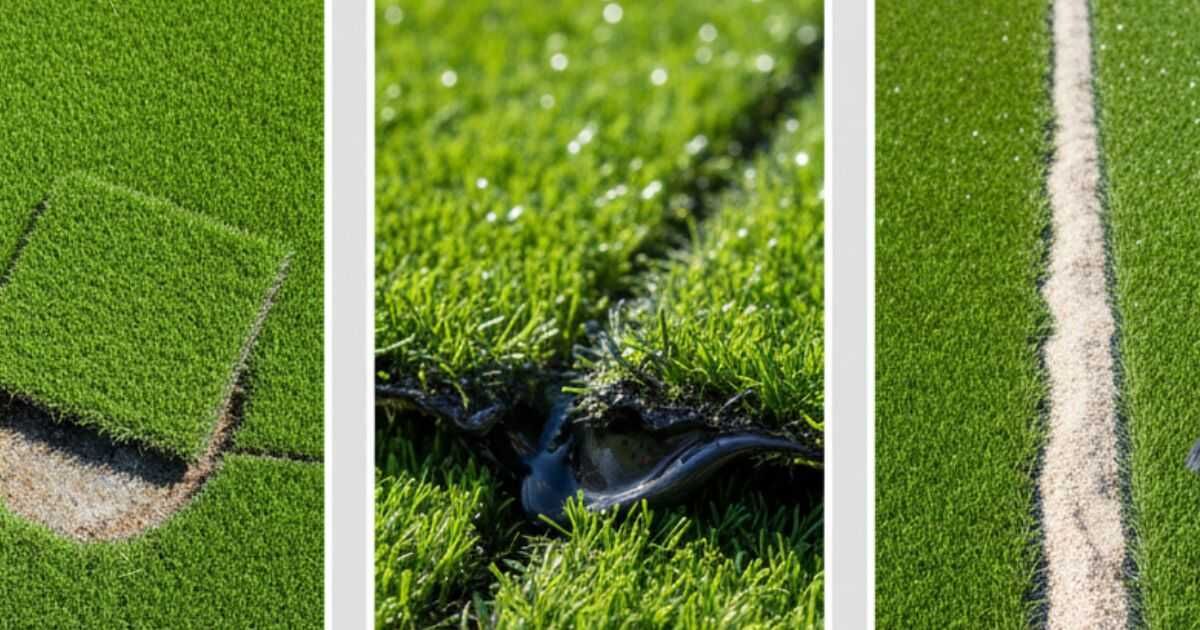
When is it better to replace synthetic grass rather than repair it?
You should replace your artificial grass rather than patch it when more than 15-20% of the surface is affected if there is:
- Extensive or scattered damage. If there are multiple cuts/burns/dents scattered throughout, the patches will accumulate a "checkerboard" effect. It is better to replace it.
- Aesthetic incompatibility. If you cannot find a patch that is identical in height, tone and density, the join will be visible (especially against the light).
- Advanced ageing. General discolouration, brittle fibres or poor drainage (collapsed base) indicate end of useful life.
- Critical high-traffic areas. In entrances, main corridors or play areas, a new piece prevents joints from reopening.
- Damaged structural base. If the cause is a poorly compacted or waterlogged base, it must be lifted, the base redone and the turf replaced.
Not sure whether to repair or replace? Our technical team can advise you on how to install artificial grass, assess the condition of the backing and base, and suggest the most cost-effective and durable option.
Frequently asked questions about repairing artificial grass
How do you cover a hole in artificial grass?
Make a rounded cut, use a template to replicate it on the rest of the turf, stick it down with specific tape/adhesive and align the backing and fibres. Finish by brushing (and adding silica if your model allows it) to even out the volume and shine.
What to do if the grass burns?
If only the tips are singed, remove them and comb around them. If the backing is damaged, cut out the area in a curve and apply a micro-patch with UV and moisture-resistant adhesive. Avoid direct heat in the future (fireproof bases, insulation under pots).
How can you repair sunken or flattened areas?
Lift the turf, recompact the base (gravel + sand with a drainage slope), reinstall and, if necessary, fill with silica sand. Sinking cannot be fixed by sticking something on top: the base must be corrected.
Can the colour be restored to faded artificial grass?
No. UV discolouration is irreversible. The solution is to replace the affected turf or renew the surface. When purchasing, choose turf with UV stabilisers to prevent this.
The opinion of our Turfexpert
- Identify the type of damage: cuts, burns, subsidence or wear and tear require different techniques (patching, recompacting the base, brushing + silica or replacing the turf).
- Avoid mistakes that give away the repair. No generic adhesives, patches with straight cuts or misaligned fibres. Always use specific bonding tape, curved cuts and identical pile orientation.
- Use the right tools and materials. Sharp cutter, lawn joint tape, exterior PU adhesive, counter-bristle brush and silica (if the model allows it). This is what ensures invisible joints and durability.
- Assess when to replace. If there is extensive damage, general discolouration or a collapsed base/poor drainage, the best investment is to replace the turf or renew the surface.
- When in doubt, consult us. At Turfgrass, we audit the condition of the backing and base, propose the most cost-effective and durable option, and, if you wish, carry out the repair professionally.
From damage to solution
You now know how to identify and repair your artificial grass when it has cuts, burns or wear and tear. The next step is to decide whether to fix it yourself or whether you need professional help to make it look like new again.
Write to us and we will advise you.
Related posts
If you found this article interesting, you may also be interested in...